Deployments
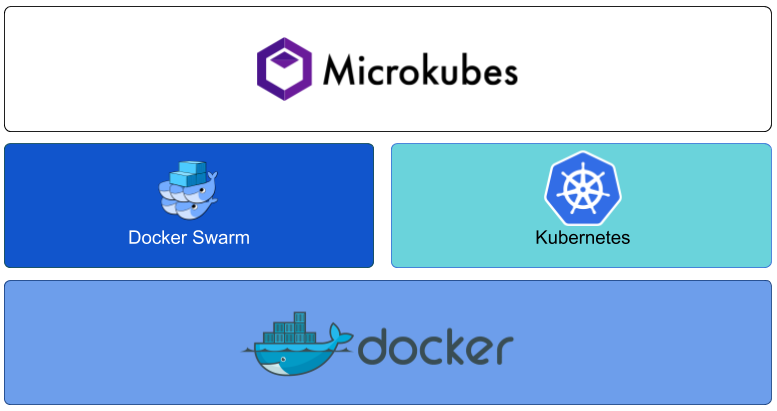
Microkubes supports Kubernetes and Docker Swarm deployments. It works out of the box on any local or cloud infrastructure, it is easy to set up and simple to use at any scale.
Each microservice has its own Dockerfile. We use multi-stage build in order to reduce the size of the image. The base image for building the microservices is the goa-build image. It contains all dependencies needed for the platform which speeds up the build process. Microkubes uses the alpine:3.7 image for running the microservices.

Kubernetes and Docker Swarm are two of the most powerful IT cloud container management platforms. Microkubes is build on top of these technologies.
Kubernetes
These instructions will let you deploy the Microkubes on Kubernetes.
Preparing
- Run a single-node Kubernetes cluster via Minikube tool
minikube start
Note: Minikube is not recommended for production use. If you have an existing cluster or prefer production ready cluster such as GCP GKE or AWS EKS, skip this command and look at those documents instead.
- Create keys for authorization servers:
./keys/create.sh
- Create a default microkubes namespace and service account
kubectl create -f kubernetes/namespace.yaml
kubectl create -f kubernetes/serviceaccount.yaml
- Create a secret from keys generated in Step 2
kubectl -n microkubes create secret generic microkubes-secrets \
    --from-file=keys/default \
    --from-file=keys/default.pub \
    --from-file=keys/private.pem \
    --from-file=keys/public.pub \
    --from-file=keys/service.cert \
    --from-file=keys/service.key \
    --from-file=keys/system \
    --from-file=keys/system.pub
- Create a secret for the mongo objects creation
kubectl -n microkubes create secret generic mongo-init-db \
        --from-file=./kubernetes/mongo/create_microkubes_db_objects.sh
Deploy Microkubes
Run the following commands:
cd kubernetes/
kubectl create -f consul.yaml
kubectl create -f kube-consul-register.yaml
kubectl create -f kong.yaml
kubectl create -f mongo.yaml
kubectl create -f rabbitmq.yaml
kubectl create -f fakesmtp.yaml
kubectl create -f microkubes.yaml
The platform takes about 5 minutes to start. You can follow the progress with kubectl -n microkubes get pods -w.
Once all services are running, you can start using microkubes.
Check that microkubes is up and running
The API gateway is exposed as a nodePort in kubernetes. You can get the URL and perform an http GET request to check if microkubes is responding.
MICROKUBES_URL=`minikube service -n microkubes kong --url`
curl $MICROKUBES_URL/users
Docker Swarm
The docker subdirectory of Microkubes platform contains docker compose files to run Microkubes platform on docker swarm.
Run Microkubes on Docker Swarm
First make sure your node is swarm manager. If not, initialize a swarm first:
docker swarm init
Then generate the keys:
cd keys
./generate-keys.sh
Once you have the keys in the keys directory, run the script to build all Microkubes docker
images:
cd ..
./build-docker-images.sh <build_directory> [<images_tag>]
This would build all Microkubes images (may take a while) in the build directory.
To deploy the full platform, run:
docker stack deploy -c docker-compose.fullstack.yml microkubes
Confirm that all services have been deployed by running docker service ls
Deploy the basic infrastructure only
We provide a compose file to deploy only the basic infrastructure and the build upon that stack. You can deploy this as a docker swarm stack by running:
docker stack deploy -c docker-compose.yml microkubes
Build images script
The platfrom provides a script to build all Microkubes images at once. It resides in docker subdirectory.
The script syntax:
./build-docker-images.sh <build_directory> [<images_tag>]
where:
build_directoryis the target directory in which to checkout the source code and from which to build the docker images. If the directory does not exists, it will be created. If the build directory already has the subprojects cloned with git, then the script will not attempt to clone the repositories and will use the existing ones. Default target directory is the current working directory.images_tag- the docker tag to append to the docker images. Default islatest(for example:microkubes/kong:latest).
The example below shows the usual Dockerfile of Microkubes service:
### Multi-stage build
FROM jormungandrk/goa-build as build

RUN apk --update add ca-certificates

COPY . /go/src/github.com/Microkubes/microservice-name
RUN CGO_ENABLED=0 GOOS=linux GOARCH=amd64 go install github.com/Microkubes/microservice-name

### Main
FROM alpine:3.7

COPY --from=build /go/src/github.com/Microkubes/microservice-name/config.json /config.json
COPY --from=build /go/bin/microservice-name /microservice-name
COPY --from=build /etc/ssl/certs /etc/ssl/certs

EXPOSE 8080

ENV API_GATEWAY_URL="http://localhost:8001"

CMD ["/microservice-name"]
Microkubes Helm Chart
Microkubes offers a simple way for deployment on kubernetes using helm charts. This directory contains a helm chart for deploying Microkubes on a kubernetes cluster. The helm chart implements all the relevant configuration parameters that can be configured through a value file or directly on command line. Also the helm chart supports deploying using an ingress to kubernetes clusters that have a configured ingress controller.
Prerequisites Details
- Kubernetes
- Helm
- Make sure that you have helm tiller running in your cluster, if not run
helm init
- Make sure that you have helm tiller running in your cluster, if not run
- Set up kubectl and kubeconfig correctly before running helm.
Deploy Microkubes on kubernetes cluster
Before deploying Microkubes on kubernetes cluster execute the following command to generate keys needed for authorization: ./keys/create.sh.
To deploy Microkubes on kubernetes cluster with the release name <release-name> within namespace <namespace-name>:
$ cd kubernetes/helm
$ helm dependency update microkubes/
$ helm install microkubes/ --namespace <namespace-name> --name <release-name> \
    --set postgresql.postgresUser=kong,postgresql.postgresPassword=<secretpassword>,postgresql.postgresDatabase=kong
Note: PostgreSQL user should be kong and database name should also be kong.
Configuration
Production deployment values can be set in kubernetes/helm/microkubes/values.yaml here. This file contains variables that will be passed to the templates. All configurable values should be placed in this file.
Alternatively, you can specify each parameter using the --set key=value[,key=value] argument to helm install.
Tip: You can use values file different from the default values.yaml that specifies the values for the parameters by providing that file while installing the chart. For example:
$ helm install --namespace <namespace-name> --name <release-name> -f microkubes/values-development.yaml microkubes/
Cleanup
To remove the spawned pods you can run a simple helm del --purge <release-name>.
Helm will however preserve created persistent volume claims, to also remove them execute the commands below.
$ release=<release-name>
$ namespace=<namespace-name>
$ helm del --purge $release
$ kubectl -n $namespace delete pvc -l release=$release
